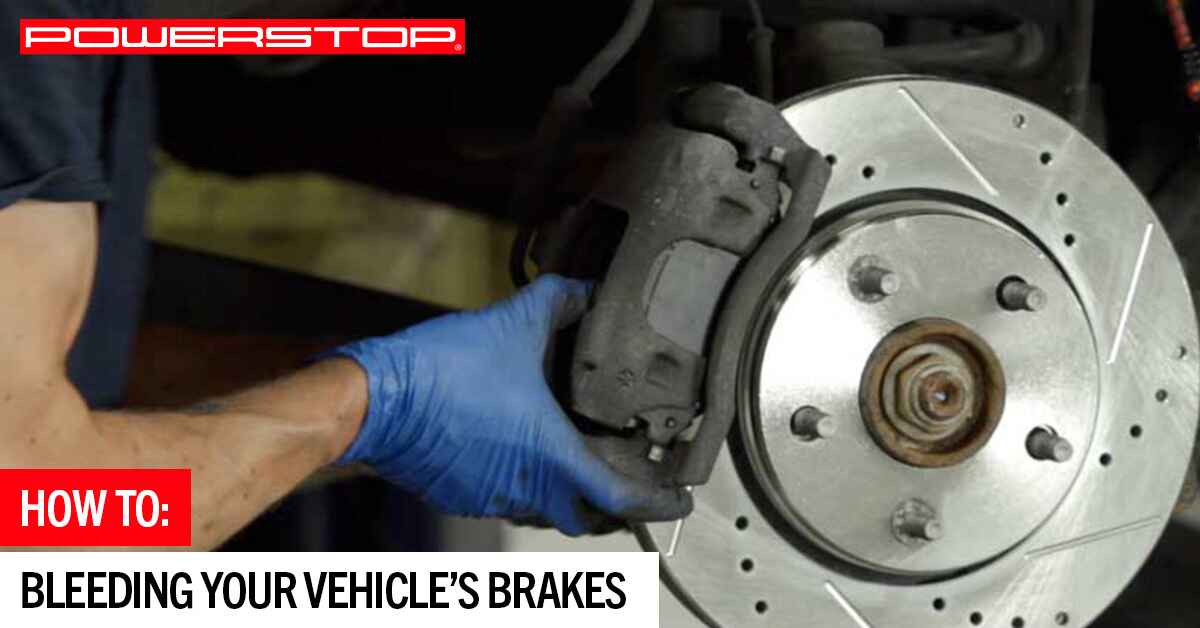
Bleeding Your Vehicle’s Brakes
Please note: All vehicles are different. The procedure below is intended as a general guide and is not a substitute for the vehicle service manual which should be referenced throughout the process. The importance of proper brake function cannot be overstated. If you are unsure of your ability to properly perform this procedure, stop and consult a professional technician.
What is Brake Bleeding?
Brake bleeding is a process by which fluid is forced through a hydraulic system with the intent of purging trapped air and/or replacing the used fluid with new fluid.
Why Should I Bleed My Brakes?
Liquid cannot be compressed, which makes fluid ideal for applications like vehicle brakes, where tremendous pressure must be generated.
Air, on the other hand, is compressible. When air is introduced to a hydraulic system, efficiency is lost. As a driver, you feel that inefficiency as a spongy or mushy brake pedal. Inefficient or soft brakes are dangerous and need to be bled to remedy the problem.
Brake fluid is also hygroscopic by nature, which means that it absorbs water. Replacing your brake fluid regularly will ensure that moisture doesn’t build up and corrode your lines from the inside out. Rust can also clog the small orifices in the system which can cause stuck calipers, non-functioning calipers, clogged proportioning valves, and other issues.
Moisture in the lines also poses a problem because of its 212* F boiling point. Brake fluid can easily exceed 300*F during normal operation which boils water and creates vapor pockets in the fluid.
When Should I Bleed My Brakes?
It is good practice to bleed your brakes during routine brake service and flush the system at least every two years as part of your normal vehicle maintenance. More aggressive drivers should bleed their brakes annually and racers should bleed their brakes before every event.
Other signs that indicate your brakes may need to be bled include when:
- Your brakes feel spongy: There are a number of reasons why your brakes may feel soft or spongy, one of which is air in the brake system.
- Stopping takes longer: Air can cause brake fluid boil, which can reduce your stopping power.
- You find a leak. Leaks don’t always just let fluid out, they can also let air in. The only way to be sure your system doesn’t have an air bubble is to bleed your brakes after repairing the leak.
- Replacing rotors or pads: Any brake job should include a brake bleed for safety’s sake.
How Do I Bleed My Brakes?
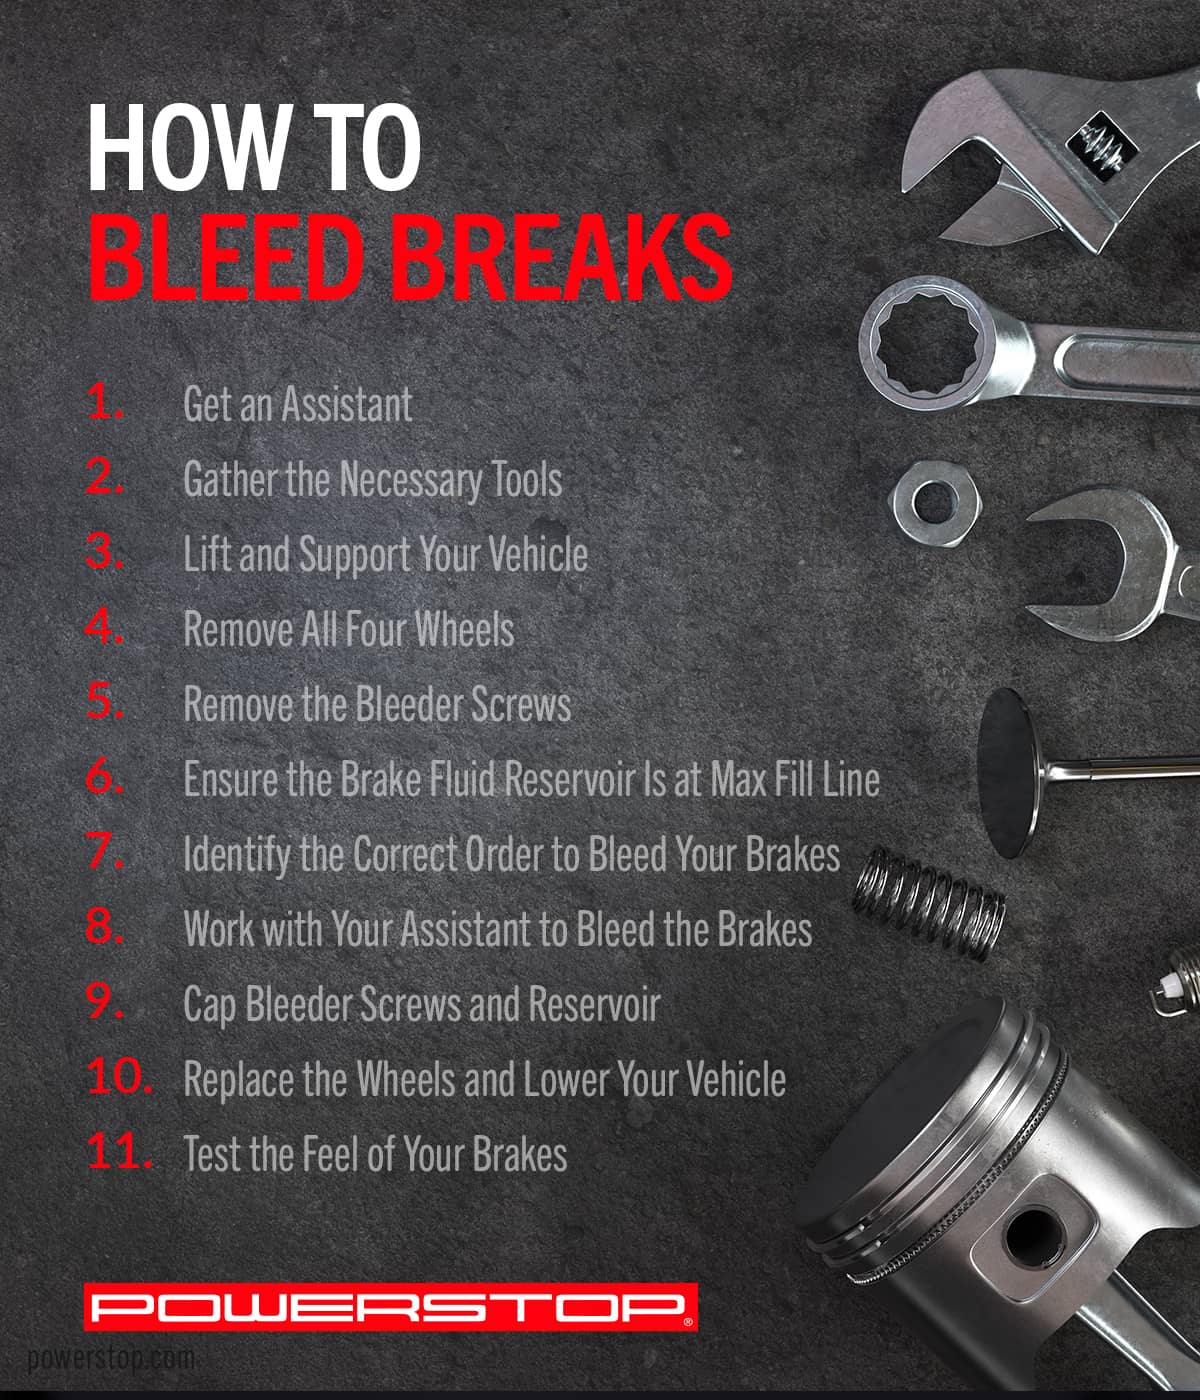
To perform the brake bleeding process yourself, follow these steps:
Step 1 – Get an Assistant
While there are other methods to bleed your brakes, this method involves getting an assistant to help you perform the process.
Step 2 – Gather the Necessary Tools
Before you begin the brake bleeding process, make sure you have all the tools you’ll need at hand. These include:
- Nitrile gloves
- Safety Glasses
- Wrench that fits your vehicle’s bleeder screws
- Extra fluid (1 pint to top off, 2 quarts for a full flush)
- Brake Cleaner
- Shop rags or towels
- A length of 3/16 ID hose
- A disposable bottle for capturing old fluid
Step 3 – Lift and Support Your Vehicle
Put on your safety glasses and gloves and refer to your vehicle’s service manual for the proper lifting and support techniques.
Step 4 – Remove All Four Wheels
Once the vehicle is lifted and supported properly, remove all four wheels to gain access to the brake calipers.
Step 5 – Remove the Bleeder Screws
The bleeder screws are always located at the top of the caliper and are usually covered with a rubber cap. Most vehicles only have one bleeder screw per caliper; however, some high-performance multi-piston calipers may have two or more.
Warning! Brake fluid is very caustic and will lift vehicle paint like a chemical stripper. Take great care to avoid spills or drips. If brake fluid comes in contact with your paint at any time, remove it quickly and clean the area thoroughly.
Step 6 – Ensure Brake Fluid Reservoir is at MAX Fill Line
Before you go any further, locate your vehicle’s brake fluid reservoir (usually atop the master cylinder) and check the fluid level. Make sure the fluid is at the MAX fill line and monitor the fluid level throughout the bleeding process to ensure it does not dip below the MIN fill line. If the fluid in your reservoir goes empty while you’re bleeding the brakes, it will complicate the process and require a more involved procedure to correct the problem. So, pay attention and check it often.
Step 7 – Identify the Correct Order to Bleed Your Brakes
You always want to bleed the lines starting with the caliper furthest from the master cylinder and work your way forward. On most vehicles, the process goes:
- Right Rear
- Left Rear
- Right Front
- Left Front
Starting with the first caliper, place the flare nut wrench of the proper size over the bleeder screw and attach the hose. Secure the waste container and run the end of your hose to it. Now ask your assistant to enter the vehicle and turn the key to the II position (don’t start the car).
Step 8 – Work with Your Assistant to Bleed the Brakes
A traditional two-person bleeding procedure relies on good communication and timing to go smoothly. Instruct your assistant to depress the pedal several times then hold it down. Your assistant should give an audible confirmation once the pedal has been fully depressed. Then open the bleeder screw a quarter to half turn briefly and let the fluid fill the attached hose. If your system has air in it, you will see bubbles come out with the fluid as well.
The bleeder screw should only be in the open position for a brief moment. As pressure drops, the flow will slow down; as it slows, close the bleeder screw. After you have snugged the bleeder screw (don’t overtighten!) tell your assistant to release the brake pedal. Stress to your assistant the importance of not releasing the pedal before you give confirmation that the bleeder is closed. Doing so will draw a large amount of air into your system making your job more difficult. Observing the fluid as it comes out for any sediment or debris will give you an idea of the condition of your brake lines. Ideally, you don’t want to see any.
Repeat the process until air bubbles are no longer visible. If you are flushing your system, continue until the fluid turns clear or the color of the new fluid being used. Work your way around the vehicle, one caliper at a time, until all air or old fluid has been purged.
Step 9 – Cap Bleeder Screws and Reservoir
Use some brake cleaner and a towel to wipe any spilled brake fluid off your calipers and cover the bleeder screws with the rubber caps you removed earlier. Do a final check on your fluid level and cap off the reservoir.
Step 10 – Replace the Wheels and Lower Your Vehicle
You can now replace your wheels and lower the vehicle. Be sure to tighten your lug nuts to the proper torque and in the proper sequence (progressive star pattern).
Step 11 – Test the Feel of Your Brakes
Start the vehicle and while in park/neutral, depress the brake pedal. After a couple of pumps, the pedal should feel nice and firm. Check for leaks at the calipers and if everything looks good, perform a couple of low-speed stops to ensure the brakes are functioning properly.
Congratulations! You now have a properly bled brake system that will provide confident, consistent, and reliable stopping power.
Have a Question? PowerStop Can Help!
PowerStop is dedicated to providing top-quality performance brakes for every vehicle on the road. If you have a question about any of our products, contact us today online or toll-free at (888) 863-4415. Our customer service team is available to answer your questions Monday through Friday from 8 a.m. to 5 p.m. (CST). Se habla español.
Back